If this is your first time hearing about this abbreviation (maintained or non-maintained), don’t worry. In this article, I will let you know the reason for this name and how you can differentiate easily between both of them.
Firstly, let me give you a brief about the lighting system in projects.
The lighting system in projects is responsible for providing the required lux & illumination in the different spaces, and the designer is the one who recommends the quantity and type of lighting fixture based on the calculations.
One of the common types of lighting fixture which must be available in the projects is the emergency lighting fixture.
What is the importance of emergency lighting fixtures?
Emergency lighting fixtures are essential to exist in any building to save lives if any fire happens to the building. During a fire, the permanent power supply will be cut off to avoid any increase in the fire.
That means any load that connects to the permanent power source will not work anymore during the fire, and this is until the maintenance team will switch on the power again after the incident is overcome.
So, if your lighting system in the building connects only to the building’s normal power supply, all the building’s spaces will be dark during the fire.
So, the non-operation of the lighting system during the fire can cause a lot of danger to any person who exists in the building during the fire, as there’s so no safe escape route for him because he can’t run away in the darkness.
At the same time, the concept of operation of the emergency lighting fixtures depends on a battery, so when the power is off from its source (electrical distribution panel), the battery will energize the lamp to operate.
That’s why the availability of the emergency lighting system in projects is vital to save lives and provide a safe and illuminated escape route during a fire to allow them to run away from the fire’s location.
What are the types of emergency lighting fixtures based on their emergency power supply?
The emergency lighting fixtures to operate during power is off needs a battery, and based on the battery’s location compared to the lighting fixture, the type will be decided as follows:
A- Self-contained emergency lighting fixtures, from its name, we can expect that the battery will exist in the lighting fixture itself, but actually, it will not contain the battery only, but also it will contain the charger, the control unit, the lamps, indication bulb, and the diffuser if exits.
The self-contained emergency lighting fixture is the standard type you can easily see in most buildings.
It’s usually designed to install it as wall-mounted or ceiling-mounted (either flush or surface mounted or suspended in the ceiling).
The most common types of self-contained emergency lighting fixtures are:
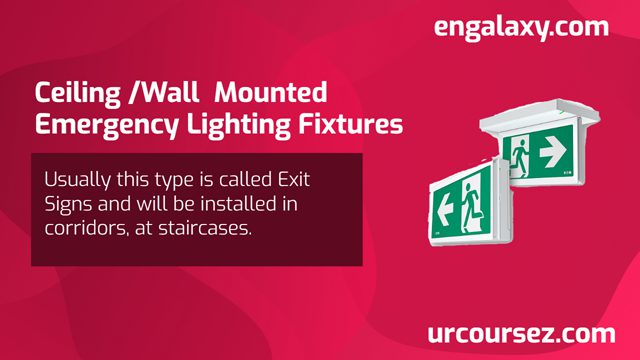
1- Wall-mounted exit light.
2- Ceiling Mounted Exit Light.
3- Wall Mounted Rectangle Twin Spot Emergency Light.
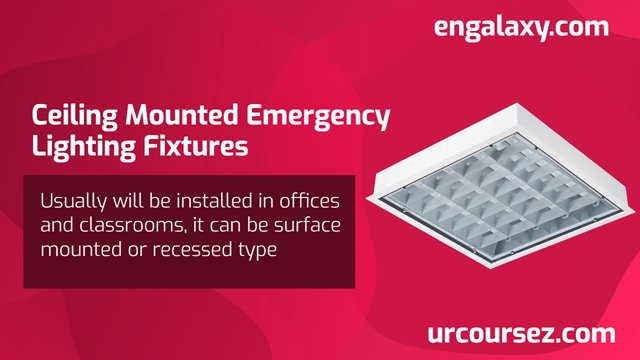
4- Square & Rectangle Emergency lighting fixtures in offices and classrooms.
B– Now, I will talk about the second type of emergency lighting fixtures based on the location of the battery, which is the luminaries that are controlled from a central battery system.
In this case, when using a central battery system, the luminaries will be called slaves because their function depends on another source of emergency power.
The British Standard BS EN 60598-2-22 identified the slave emergency lighting fixtures as follows “luminaire for maintained or non-maintained operation which is energized from a central emergency power system that is not contained within the luminaire.”
What does the slave emergency lighting fixture contain?
The slave emergency lighting fixtures contain its lamps and usually some of the control gear for its operation, but the battery and its charger will be located in another location, which provides a central supply to multiple emergency luminaries.
Usually, in the big projects, there’s a separate room contains these central battery system units, and mostly this room will be located on the basement floor and is called the battery room.
What are the advantages & disadvantages of the self-contained and central battery systems?
I will start listing the pros & cons of the self-contained system:
1- Self-contained system:
Pros:
A- Ease and speed of installation are fast.
B- No loss of the total system.
C- No regular battery maintenance
D- No battery room required.
E- Flexibility.
Cons:
A- The power of the self-contained lighting fixture’s lamp is limited.
B- The cost of periodic testing is more significant, as each fixture has its own battery.
C- This type is not suitable for the hazardous environment.
D- The lifetime of the battery is short.
E- The operation temperature of the battery will affect the operation of the fixture.
2- Central Battery system:
Pros:
A- long battery life if it’s maintained.
B- Easier and automatic testing.
C- Real-time monitoring.
D- Few Temperature effects.
E- The cost is less expensive.
Cons:
A- Maintenance is required for the batteries on a regular basis.
B- A cabinet is required for the batteries.
C- Limited flexibility.
D- The complete system will fail in case a fire happens inside its room.
E- Separate wires are required from the central battery system to different locations where we have the emergency lighting fixtures.
You can find the full comparison in the Fire Protection Association (FPA) Emergency Lighting Handbook.
So now we reach our main question.
What is the difference between maintained and non-maintained emergency lighting fixtures?
In short words, the synonym “maintained” means the emergency lighting fixture is always On; this is regardless of the power exists or cut-off.
But take care you shall differentiate between the availability of power and the switching.
The maintained Emergency Lighting Fixture:
As the maintained emergency lighting fixtures are switchable units and we can control them on or off (during the availability of a power source).
Usually, if this type is a square fixture 60x60cm with four lamps, 3 of these are not connected to a battery, while the fourth lamp is connected to a battery, and we can see this type of maintained emergency lighting fixture in classrooms, offices.
For better understanding, I will explain two scenarios of operation for this type, which exists in a classroom:
Scenario 1:
This maintained lighting fixture in normal operation is off, so when a student enters the classroom, he will press on the ordinary wall-mounted lighting switch and switch on the light. In this case, all the lamps will be on, then when he leaves the classroom and switch off the lighting switch, all the lamps of the maintained lighting fixture will be off, but still, the power source which comes from the panel is available (no power cut-off).
Scenario 2:
The lamps are off, but suddenly after a while, the electrical source that feeds the panel of the maintained lighting fixture is cut, so only the lamp that is connected to a battery of the maintained lighting fixture will be turned on, and the other lamps will be off. This is regardless the switch of the classroom is on or off.
The non-maintained Emergency Lighting Fixture:
While a non-maintained emergency lighting fixture means it will operate only when the power is off. So, when the power source is connected to the lighting fixture, the lamp will not be on, and the battery will be only in the charging mode.
The problem of this type we can’t know the battery is working fine or not unless we have a power failure, so in this case, if the lamp is energized, that means the battery is good, and if not, that means the battery needs maintenance or replacement.
We usually install the maintained emergency lighting fixture where we need a high level of illumination.
If you like this post, please leave a comment, and share it with your network from the share social buttons at the top of this article.
Here is a list of the electrical tools which will be required to complete the termination of the electrical lighting panel:
You can read also:
Electrical Panel Schedule in Projects – 23 Important Notes you need to know
Knockout Hole Punch – How to use it in 5 easy steps
Torque Wrench – Your Best Guide in 4 Minutes
Electrical Panels – No.1 Guide in their Practical installations On-Site
Top 10 important tools with the electrician in Infrastructure Works
The Common 7 MEP Mistakes & Solutions in the Construction Projects- Your Best Guide
Your Easy BMS Guide “Building Management System” in Projects – No.1 Guide
Your Easy Guide in Understanding the Fire Alarm System from A to Z, 100% you will be satisfied
The Most Important 10 PPE in Construction Projects
Your No.1 Guide for better understanding MEP Infrastructure Networks in construction projects
No.1 Easy Guide about VRF & VRV Systems